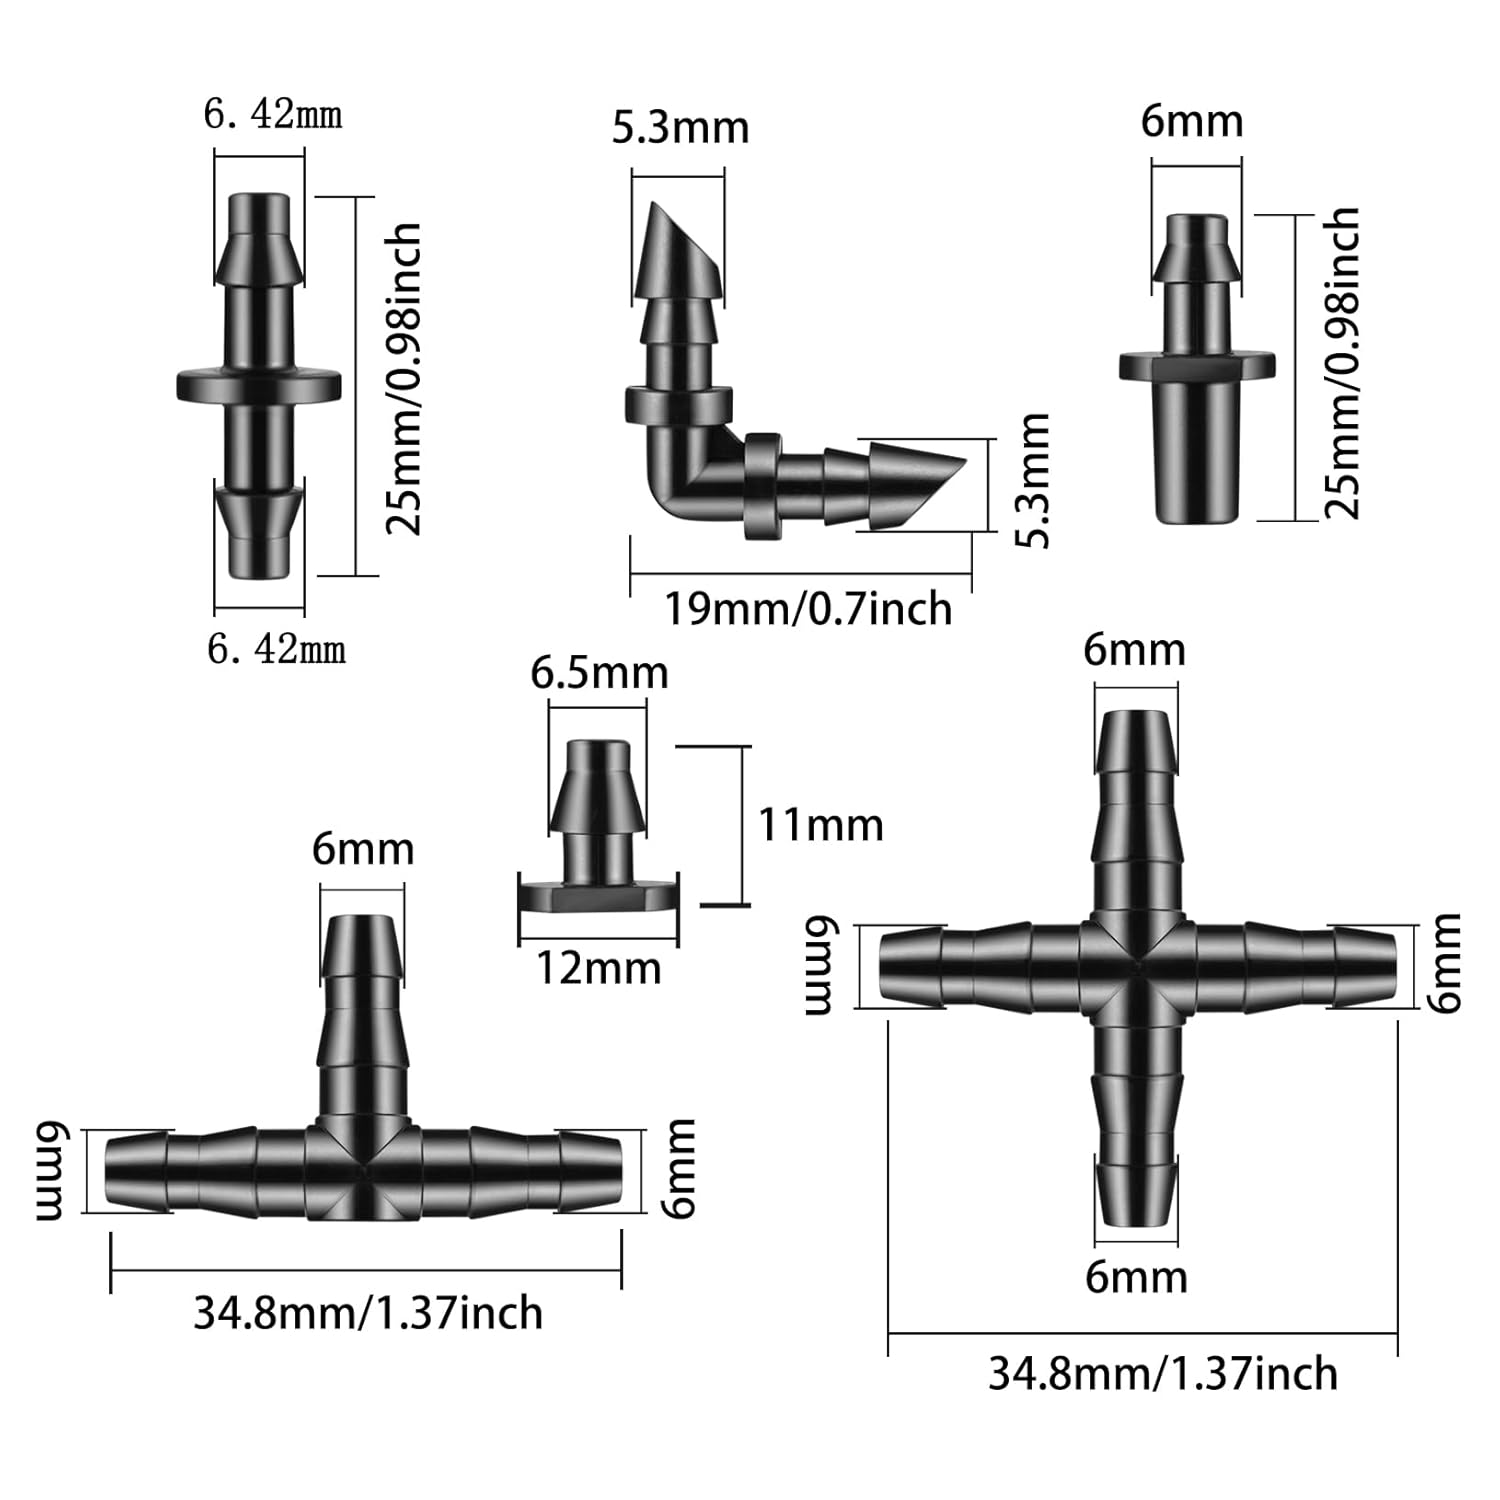
You spent a weekend running quarter-inch tubing through three raised beds, punched in your emitters (the small devices that release water slowly, directly at plant roots), and called it done. The system worked beautifully for about eight months. Then a fitting popped loose after a hard frost, a section of tubing went brittle in the sun, and suddenly you’ve got a muddy trench where your kale used to be. Sound familiar? Drip irrigation — a method that delivers water at low pressure directly to the root zone rather than spraying it overhead — is one of the highest-return investments you can make in a property’s outdoor infrastructure. But the components that connect it all together are where most Year Two failures actually live. This guide breaks down tubing specs, fitting types, and repair kit strategy so you’re buying the right parts the first time — and so that when something does fail (and something always does), the fix takes fifteen minutes instead of a full teardown.
Why Fittings Fail: The Three Root Causes
Before we get into product specifications, it helps to understand why drip fittings fail in the first place. Across aggregated installer reviews and published guidance from the University of California Agriculture and Natural Resources in their document Drip Irrigation in the Home Landscape, three causes account for the overwhelming majority of mid-system failures.
1. Thermal cycling. Tubing expands when warm and contracts when cold. Barbed fittings — the push-in connectors that grip the inside wall of your tubing — rely on that tube wall staying snug. When a fitting is slightly undersized or the tubing has hardened from UV exposure, thermal contraction during winter can break the seal. This is the single most common cause of the “it worked fine all summer then I had a leak in April” scenario.
2. UV degradation. Polyethylene tubing (PE tubing — the standard black flexible pipe used in drip systems) contains UV stabilizers when manufactured to spec, but budget-tier tubing often skimps on additive concentration. After 18–24 months of direct sun exposure, that tubing becomes brittle, loses flexibility, and develops micro-cracks around fitting insertion points. The Irrigation Association’s Landscape Irrigation Best Management Practices document specifically flags UV-rated tubing as a minimum specification for any surface-laid system.
3. Wrong-diameter fittings for the tubing wall thickness. Here’s where practitioners get caught: not all half-inch poly tubing has the same inner diameter. “Half-inch” is an outside-diameter nominal — meaning the industry labels it by the outside measurement — but wall thickness varies by manufacturer. A barbed fitting designed for one wall thickness may not seat correctly in tubing from a different brand. This is why mixing Hunter, Rain Bird, and generic-brand components in the same system is a legitimate compatibility risk, not just a tidiness concern.
Tubing Specifications: What the Numbers Actually Mean
When you’re sourcing mainline tubing (the primary supply line that carries water from your valve to the distribution area) and distribution tubing (the smaller lines that branch off to individual emitters), there are four spec-sheet numbers that matter.
Outside diameter (OD) vs. inside diameter (ID). As noted above, OD is what most labels show. ID is what determines flow capacity and fitting compatibility. For half-inch poly mainline, a typical ID runs between 0.600” and 0.620” depending on brand. Fine Gardening’s guide to drip system design notes that mixing brands without verifying ID is one of the most common DIY installation errors.
Wall thickness. Thicker walls handle pressure better and resist UV cracking longer. Standard residential drip mainline runs at 0.060”–0.080” wall. For runs over 200 feet or systems operating at the higher end of residential pressure (50–60 PSI at the source), spec 0.080” or above.
Pressure rating. Most residential poly tubing is rated for 30–60 PSI. Your drip system should be running at 15–30 PSI at the emitter zone (after a pressure regulator — a device that drops incoming line pressure down to the range drip emitters can handle without blowing off). Tubing rated above your operating pressure isn’t wasteful; it’s margin against pressure spikes.
UV rating. Look for tubing explicitly described as “UV-stabilized” or “UV-resistant” on the spec sheet, not just the product name. Budget rolls sold in big-box stores frequently omit this rating from the label. UV-rated tubing from name-brand suppliers (Rain Bird, Hunter, Netafim, Toro) carries the additive load to survive 5–10 years of surface exposure.
By the Numbers: Tubing Spec Quick Reference
| Spec | Entry-Tier Tubing | Pro-Grade UV-Rated |
|---|---|---|
| Typical wall thickness | 0.050”–0.060” | 0.070”–0.090” |
| UV stabilizer rating | Often unlisted | Explicitly spec’d |
| Expected surface lifespan | 18–36 months | 5–10 years |
| Price premium over entry | — | 20–40% per roll |
The math on that premium is straightforward: if a 500-foot roll of pro-grade tubing costs $30 more than the entry version and buys you six extra years before replacement, you’re paying $5/year for that peace of mind. On a multi-zone install with $400–$600 in total component cost, that’s the right place to spend the difference.
Fitting Types: A Decision Framework
Drip irrigation fittings fall into three families. Knowing which to use where is what separates a system that holds for a decade from one that needs attention every season.
Barbed fittings. These are the workhorses — elbows, tees, couplings, and end caps with a ridged barb that inserts into the tubing end. They hold by friction and compression. Pros: inexpensive, widely available, tool-free installation. Cons: vulnerable to the thermal cycling problem described above, and can be difficult to remove without damaging tubing if you need to reconfigure a zone. Barbed fittings from Rain Bird and Hunter are designed to spec with their own tubing IDs; if you’re running their tubing, use their fittings.
Lock-ring / compression fittings. These add a secondary locking collar or compression sleeve around the barb, mechanically capturing the tubing rather than relying on friction alone. This Old House’s drip installation coverage specifically recommends lock-ring fittings for any climate with hard freezes, noting that the mechanical retention holds through freeze-thaw cycling where standard barbs can loosen. Cost is typically 2–4x barbed fittings per piece, but for header connections (the primary junctions closest to your valve where a leak creates the most damage), the upgrade is defensible.
Insert fittings with clamps. Used in higher-flow agricultural systems and occasionally in large-property residential installs, these pair a barbed insert with a stainless or poly clamp tightened over the tubing. Overkill for most residential drip, but appropriate if you’re running 3/4” mainline to supply multiple zones with combined flow demands above 2 GPM (gallons per minute).
Decision rule: If your system is in a freeze-climate zone (USDA zones 3–6), use lock-ring fittings at every header connection and at any point where a leak would be difficult to access. Barbed fittings are fine for mid-run distribution tubing in sheltered or mulched beds. If you’re in a no-freeze climate (zones 9–11) and the system is mulch-buried, barbed fittings system-wide are a reasonable cost decision.
Repair Kits: What to Stock Before You Need It
The practitioners who handle Year Two problems fastest are the ones who stocked a repair kit at install time, not the ones who drove to the hardware store with a muddy piece of tubing in hand looking for something that might fit.
A competent repair kit for a 3–5 zone residential drip system includes:
- Straight couplings: one per 100 feet of mainline installed. These let you cut out a damaged section and splice in fresh tubing.
- Goof plugs: small barbed caps you insert into an emitter hole punched in the wrong location. Every experienced installer has mis-punched a hole. Budget 10–15 per system.
- A tubing cutter or sharp scissors: clean cuts are the difference between a fitting that seals immediately and one that leaks because the tubing end is ragged.
- Spare emitters: one or two extras of each flow rate you used (typically 0.5 GPH, 1 GPH, and 2 GPH — gallons per hour, the rate at which water exits each emitter). Emitters clog and occasionally crack; matching your existing flow rates is essential for zone balance.
- A pressure gauge with a hose-thread adapter: this is the one tool most DIYers skip and most practitioners own. Attaching it to the system end of a zone tells you immediately whether a pressure problem (too high or too low) is causing emitter failure. The Irrigation Association’s best practices document cites undiagnosed pressure issues as the leading cause of “unexplained” emitter underperformance.
For multi-zone systems with smart controllers — the type that integrate with HomeKit, Alexa, or Google Home for app-based zone scheduling — also keep a note of your controller’s flow sensor compatibility. Some repair configurations (adding a zone, relocating a manifold) can affect the flow readings your controller uses for leak detection. Rachio, Rain Bird, and Hunter all publish compatibility documentation for their flow sensor add-ons; consult those before any mid-system reconfiguration.
Expansion Planning: Design the Exit Before You Need It
The most expensive repair in a drip system isn’t fixing a leak — it’s retrofitting a system that was never designed to expand. If there’s any possibility you’ll add a raised bed, a planter zone, or a drip line for a new tree in the next three years, build that capacity in at installation time.
The practical moves are simple. First, size your mainline for future load. A 1/2” poly mainline can typically support 200 GPH of total emitter output (per UC ANR guidance on residential drip capacity) before pressure loss becomes a zone-balance problem. If you’re currently running 80 GPH across two zones, you have headroom. Second, install a manifold — a multi-port valve assembly — even if you’re only activating two ports now. Capping unused ports costs almost nothing. Adding a manifold after the fact when your supply line is buried under mulch and edging costs time and a lot of frustration. Third, mark your mainline run with marking paint or a weatherproof diagram before you cover it. The single most universal complaint in long-run drip system reviews, across forums and aggregated owner feedback alike, is “I forgot where I buried the tee.”
If X, Then Y: Decision Rules for This System
If you’re in a freeze climate and your system is surface-laid: Use UV-rated tubing and lock-ring fittings at every header. Drain or blow out the system before first freeze. Budget for a full emitter check every spring before the first run.
If you’re running a multi-zone system above 150 GPH total load: Size your mainline at 3/4” rather than 1/2”. The flow capacity difference matters; the cost difference is modest.
If you’re mixing components from multiple brands: Verify inner diameters before committing. A digital caliper costs less than a rework.
If you’re installing for a client rather than yourself: Stock the repair kit and leave it labeled. The callback you avoid is worth more than the cost of a handful of couplings and goof plugs.
The drip system that fails at Year Two almost always had the same problem: components specified to “work” rather than specified to last. The tubing specs, fitting choices, and repair inventory decisions you make at installation are what determine whether you’re doing a fifteen-minute fix in Year Three or a full system teardown. Per Fine Gardening’s drip irrigation coverage, the systems that deliver consistent performance over the long run are overwhelmingly the ones where the installer treated fittings as a design decision rather than an afterthought. That’s the right frame — and now you have the numbers to back it up.